


Table of Contents
- Why servicing matters now: the safety and savings argument
- Daily and weekly care checklist for operators
- Lamp and acrylic lifecycle management
- Ventilation, cooling and mechanical upkeep
- Electrical safety, timers and professional servicing schedule
- Hygiene, infection control and salon protocols
- Cost-benefit, record-keeping and predictive maintenance
- Start servicing today: three-month action plan
Why servicing of commercial sunbed matters now: the safety and savings argument
Picture this: it’s peak afternoon at your salon, three beds running, and suddenly one lamp starts flickering wildly before cutting out completely. Your client’s panicking about uneven exposure, you’re facing an angry customer, and that’s just the beginning of a very expensive day.
Here’s the truth that’ll save you money and keep people safe: regular servicing isn’t optional anymore, it’s absolutely critical for both your wallet and your legal responsibilities.
Safety stakes
The numbers don’t lie about what happens when you skip servicing. Average sunbed lifespan drops from 5-15 years with proper care down to just 3-5 years without it. That commercial unit you bought expecting to last a decade? Without servicing, you’re looking at replacement after four years instead of eight.
But the real issue is UV output variability. When components start failing, they don’t just stop working – they create unpredictable radiation levels that clients can’t see or feel until damage is done. Inconsistent lamp performance means some areas deliver intense exposure while others barely work, creating the perfect storm for skin damage.
Economic stakes
The financial hit comes fast and hard when things go wrong. Emergency repairs typically cost £350-£700 per incident, and that’s assuming you catch problems before they cascade. Full commercial unit replacements can reach £5,000, money that disappears overnight when a neglected system finally gives up.
Then there’s the hidden costs – lost revenue from downtime, compensation for disrupted appointments, potential insurance claims if safety issues arise. One salon owner told me they lost £1000 in bookings during a three-day repair wait, all because they’d ignored warning signs for months.
Regular servicing flips this equation completely. Instead of crisis spending, you’re looking at predictable maintenance costs that actually extend equipment life and maintain consistent performance. The difference between planned servicing and emergency fixes? About £2,000 per year for most commercial operations.
So what daily habits stop a surprise replacement bill? Let’s look at the practical steps that keep your equipment running safely and profitably.
Daily and weekly care checklist for commercial sunbed operators
Maintaining hygiene standards isn’t just a legal requirement – it’s what keeps your equipment running smoothly and your clients happy.
You’d be surprised how many operators skip the basics, then wonder why their sunbeds start looking shabby after six months. The daily routine doesn’t take long, but it makes all the difference.
Your daily post-session routine should become automatic – these six steps take under three minutes:
- Switch off the bed and let it cool for 30 seconds before cleaning
- Wipe down the acrylic surface with a non-ammonia, UV-safe cleaner using lint-free cloths
- Disinfect all flat surfaces the client touched – handles, control panels, bed edges
- Give the air vents a quick visual check for obvious blockages or excessive dust
- Check the hinges move smoothly when opening and closing the canopy
- Replace any disposable hygiene products and tidy the area
Caution: Only use disinfectants specifically approved for tanning equipment – household cleaners can damage acrylic surfaces and void warranties.
The weekly inspection takes about eight minutes but catches problems early. I’ve seen operators save hundreds in repair costs just by spotting issues before they get serious.
Your weekly checklist should cover these visual checks:
• Examine acrylic panels for hairline cracks, especially around the edges • Test all hinges for smooth movement and apply approved lubricant if needed • Check fan intakes for dust buildup that restricts airflow
• Look for loose screws on external panels and control units • Inspect door seals for wear or gaps that let light escape • Verify all safety stickers and warning labels remain clearly visible • Clean and check the condition of ventilation grilles • Note any unusual sounds when the bed is running
| Cleaner type | Safe for acrylic? | Why |
|---|---|---|
| Non-ammonia disinfectant | Yes | Gentle on surfaces |
| Ammonia-based products | No | Causes crazing |
| Abrasive cleaners | No | Scratches acrylic |
The key is consistency rather than perfection. Some weeks you’ll spot nothing unusual, other weeks you might notice a small crack or hear a fan running rough. That’s exactly what this routine is designed for.
Most suppliers stock pH-neutral, non-abrasive disinfectants designed for salon use. Look for products labeled as UV-equipment safe rather than general-purpose cleaners. The extra cost is minimal compared to replacing damaged acrylic panels.
If you spot hazing or dim output during weekly checks, next learn how to manage lamps and acrylics.
Lamp and acrylic lifecycle management
Ever wondered why your sunbed sessions aren’t giving the same results they used to? Nine times out of ten, it comes down to tired lamps or cloudy acrylics. These two components are basically the heart of your tanning equipment – when they start failing, everything else becomes pointless.
Replace lamps after 500-800 hours; expect 20-30% output drop after this period.
Most operators I’ve met tend to push their lamps way past their useful life. It’s understandable – replacement costs add up quickly. But here’s what actually happens when you delay too long.
Lamp thresholds
Replace after 500-800 hours; output drops 20-30% beyond this. That’s not just a number someone made up – it’s based on how fluorescent UV tubes actually degrade over time. The phosphor coating inside gets worn down, and the mercury vapour becomes less effective at producing UV radiation.
You’ll notice customers starting to complain about weak tans or asking for longer sessions. That’s your first warning sign. When people need 15 minutes to achieve what used to take 10 minutes, your lamps are telling you something. Some operators think they’re being helpful by extending session times, but they’re actually creating problems. Longer exposures with weak lamps can cause uneven tanning and increase the risk of overexposure in certain areas.
Digital hour counters make tracking straightforward – just check the display and note it down. If you’re working with older equipment that lacks built-in counters, keep a manual log. Write down installation dates and estimate usage hours based on daily operation time. It’s not perfect, but it’s better than guessing.
Acrylic lifespan
Acrylic degradation loses 10-15% transparency per year; replacement costs £300-1300 per sheet. That transparency loss isn’t just cosmetic – it directly affects how much UV reaches the customer.
Visual inspection tells you a lot. Hold the acrylic sheet up to bright light and look for cloudiness, scratches, or that general hazy appearance that develops over time. Sometimes the degradation is so gradual that you don’t notice it until you compare an old sheet with a new one side by side.
UV transmission checks give you concrete numbers. A UV meter placed on both sides of the acrylic will show you exactly how much light is being blocked. Fresh acrylic should allow nearly all UV to pass through, while aged sheets might block 20% or more.
When removing acrylic sheets, work slowly and get someone to help you. These things are heavier than they look and can crack if you twist them the wrong way. Store replaced sheets carefully if you plan to dispose of them later – cracked acrylic creates sharp edges that can cause nasty cuts.
Measuring UV output
Using a UV meter isn’t complicated, but you need to be systematic about it. First, ensure the lamps have been running for at least 10 minutes to reach stable output. Place the meter at the standard tanning distance – usually around 20cm from the tubes. Take readings at several points across the bed surface, not just one central measurement.
Record everything in a logbook with dates, lamp hours, and meter readings. This creates a pattern that helps you predict when replacement will be needed. Some meters give readings in milliwatts per square centimetre, others use different units – what matters is tracking the trend over time.
Professional UV intensity testing every 6 months provides official documentation that many insurance policies require. These technicians have calibrated equipment and can spot issues you might miss with basic meters. The cost is usually worth it for the peace of mind and regulatory compliance.
Safe disposal of fluorescent lamps requires proper recycling facilities. In the UK, these contain mercury and must go to designated collection points – never just bin them. Many electrical retailers and council recycling centres accept them. Acrylic sheets can often go in standard recycling, but check with your local authority first.
With lamps and acrylics addressed, the next priority is keeping the machine cool and mechanically sound.
Commercial sunbed ventilation, cooling and mechanical upkeep
Heat kills equipment faster than you’d think. When temperatures climb inside your tanning bed, everything suffers – ballasts work harder, lamps dim quicker, and even the acrylic starts to warp. That’s why proper cooling isn’t just nice to have, it’s essential.
Cooling: Fans at 50-100 CFM to maintain <40°C internal temps. This isn’t random – keeping things under 40°C means your ballasts won’t overheat and fail early. Lamps last longer too, and the acrylic won’t develop those annoying stress cracks. You can check internal temps with an IR thermometer pointed at the ballast housing area (avoid the lamp surface itself – it’ll always read hot). Most decent beds have this sorted, but older units sometimes struggle.
Moving parts need attention too. Hinges get stiff, seals perish, and before you know it things start squeaking or won’t close properly. Check hinges monthly – a drop of silicone-based lubricant works wonders. Never use oil-based stuff near electrical equipment. If you hear squeaks or notice the canopy doesn’t align like it used to, that’s your cue.
Daily checks keep problems small:
- Listen for unusual fan noise
- Feel for hot spots on external surfaces
- Check that vents aren’t blocked
- Test hinge movement
| Problem | Quick operator action |
|---|---|
| Squeaky hinges | Apply silicone lubricant to pivot points |
| Blocked air vents | Clear debris, check for insect nests |
| Misaligned canopy | Tighten visible mounting screws (not electrical panels) |
| Hot external surfaces | Ensure all vents clear, check fan operation |
| Reduced airflow | Clean intake filters, inspect for obstructions |
Vents get forgotten until something goes wrong. I’ve seen beds where a simple blocked drain caused water to pool and create a hot spot that damaged the ballast. Check your air paths monthly – insects love warm spaces and will build nests in intake vents. A torch and a quick look saves headaches later.
Filters need regular cleaning too. Dust buildup restricts airflow and forces fans to work harder. Most can be vacuumed or washed depending on type. Just make sure they’re completely dry before refitting.
The mechanical side is usually straightforward maintenance. But if mechanical checks reveal electrical anomalies (sparks, burning smell), proceed to the electrical safety and professional servicing section.
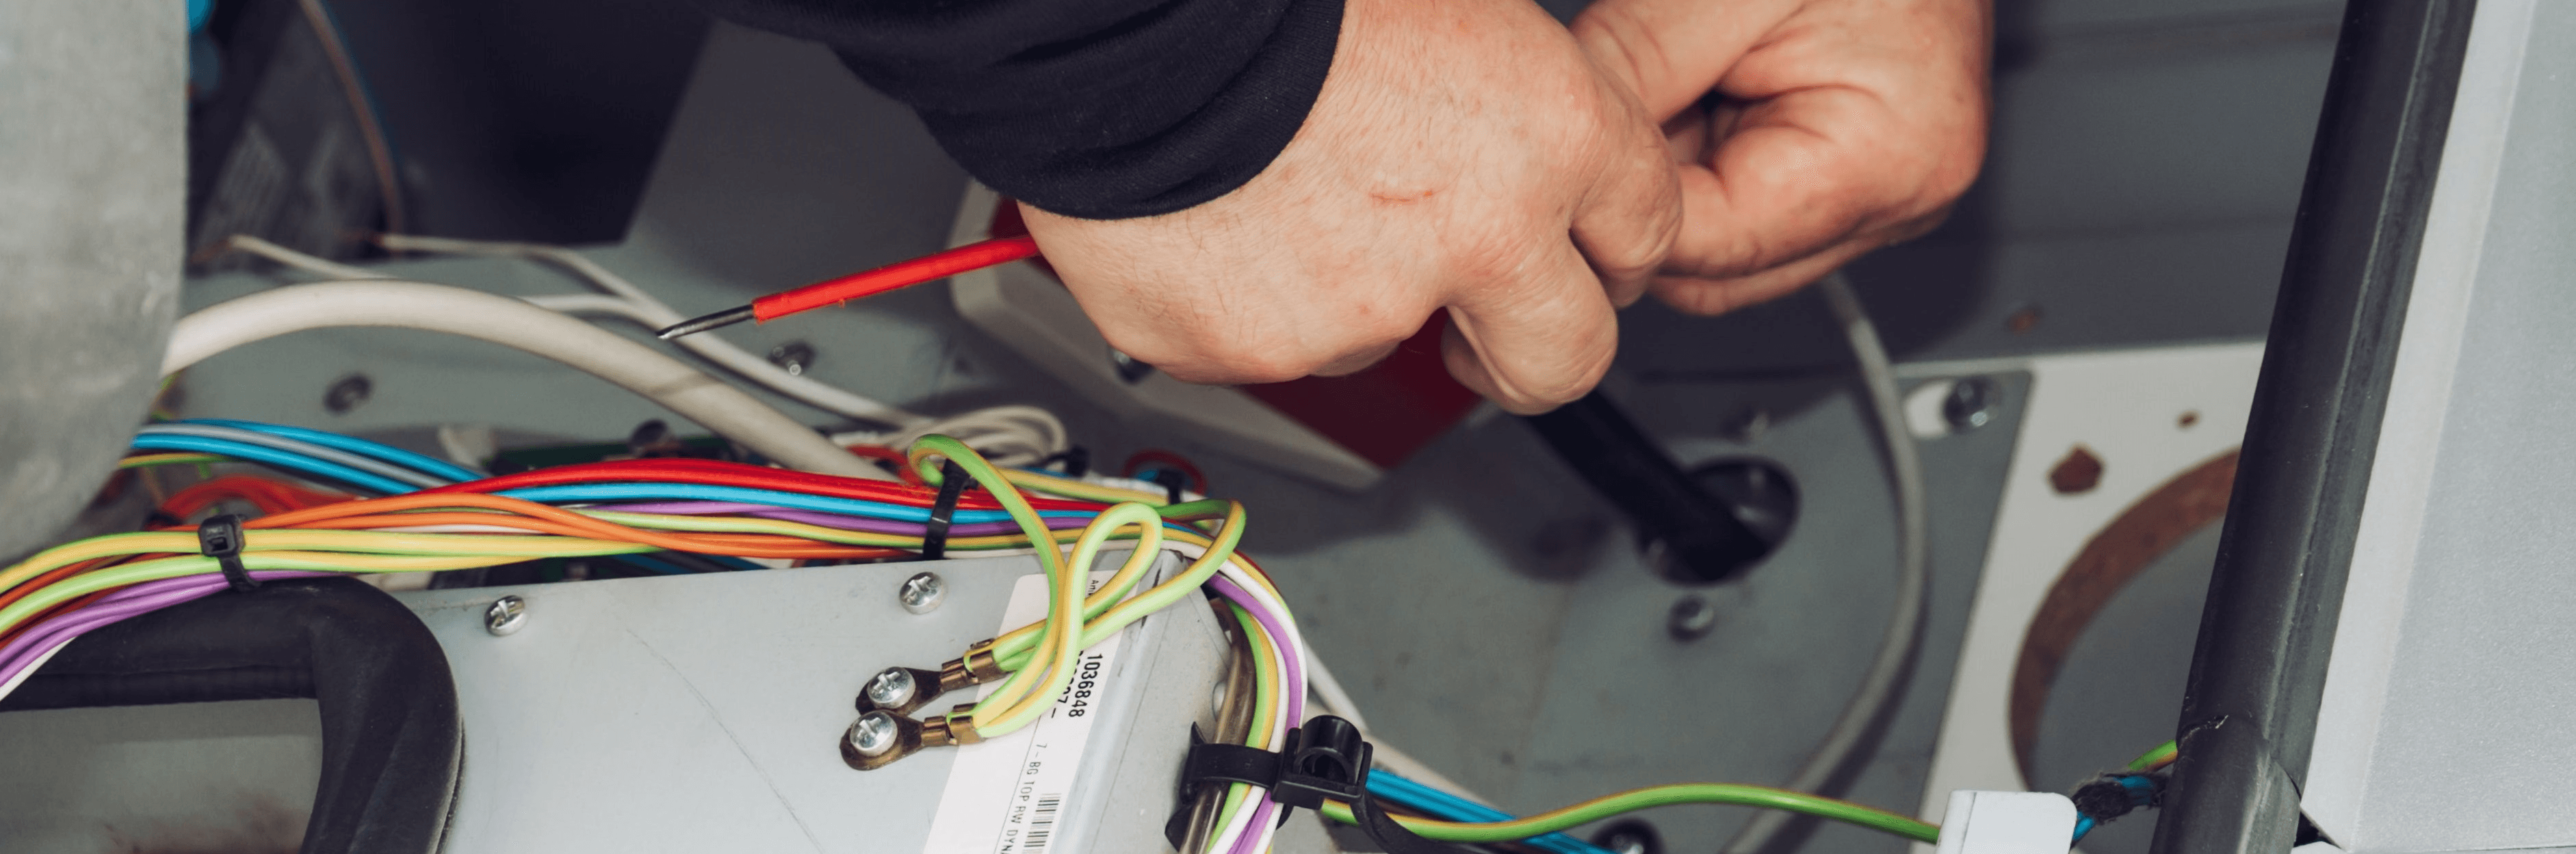
Electrical safety, timers and professional servicing schedule
Last month, a salon owner called me after their sunbed started flickering during sessions. Turned out the ballast had been overheating for weeks – something a proper electrical check would have caught early. That’s exactly why you need a clear schedule for professional inspections.
Most people think about cleaning and lamp changes, but the electrical bits? That’s where things get properly dangerous if you ignore them. You’ve got timers that control session lengths, ballasts that power the lamps, and all the wiring that makes everything work. Miss a problem here and you’re looking at equipment failure or worse.
The professional servicing schedule follows a simple pattern that actually makes sense:
| Frequency | Professional Scope |
|---|---|
| Daily | Operator visual checks only |
| Weekly | Basic function verification |
| Monthly | Deep clean and mechanical inspection |
| Annual | Full electrical safety inspection |
That annual electrical check is the big one. A qualified technician should inspect all visible wiring, test the earth connections, verify ballast function, and calibrate the timers. They’re not just having a quick look – proper testing equipment gets used to make sure everything’s working safely.
You don’t need to be an electrician to spot trouble brewing. Watch for lamps that flicker or take ages to start up. Smell anything burning or unusual? That’s your cue to switch off immediately. Circuit breakers that keep tripping aren’t being awkward – they’re trying to tell you something’s wrong. And if session timers start running long or cutting short, that’s another red flag.
When you spot any of these signs, here’s what you do: turn off the equipment, isolate it from power, write down what happened, put an “out of order” sign on it, tell your manager, then call a qualified engineer. Don’t try fixing it yourself or letting anyone else have a go.
The compliance side matters more than people realise. EN 60335-2-27 from 2003 sets out safety requirements for UV equipment, and you need proper documentation of your professional checks. Trading standards or your insurance company might want to see these records during an audit. Keep everything filed properly – it’s not just bureaucracy, it protects your business.
I’ve seen too many places that think they can skip the annual electrical inspection to save money. False economy really, because when something goes wrong, the costs pile up fast. Plus you’ve got staff safety and customer confidence to think about.
The thing about electrical faults is they rarely announce themselves politely. One day everything seems fine, next day you’ve got a dead sunbed and potentially dangerous conditions. Regular professional checks catch these issues while they’re still manageable.
After electrical safety is secured, maintain hygiene to protect users and components from corrosion and biological contamination.
Hygiene, infection control and salon protocols
Post-pandemic expectations changed everything for salon hygiene. What started as infection control became something more – proper cleaning actually makes equipment last longer too. Those expensive acrylic surfaces and internal components respond well to the right approach.
Products and protocols
pH-neutral disinfectants are your best friend here. The harsh stuff might kill germs faster, but it also clouds acrylics and corrodes metal parts over time. Non-abrasive cleaners preserve that crystal-clear finish clients expect whilst protecting the electronics underneath.
After each session, a quick wipe-down takes thirty seconds. Then schedule deep disinfection weekly – or more often if you’re busy. Tansun Sunbeds (August 2024) stresses post-session hygiene, and they’re right. It’s not just about looking professional anymore.
The timing matters too. Clean immediately after use when surfaces are still warm – products work better and residue comes off easier. I’ve seen salons skip this step during peak hours. Big mistake.
Client policies
Your policies can prevent damage before it starts. No oils or lotions on skin – they might smell nice, but they degrade acrylic surfaces and leave film on everything. Post clear signage explaining why.
Here’s what works for client notices: “For equipment protection and hygiene standards, please shower before sessions and avoid skin products. This keeps our beds in perfect condition for everyone.”
Session limits matter for equipment longevity. European Standard limits sessions to 60 per year per user – enforce this. Overuse doesn’t just risk skin damage, it wears out components faster. UV lamps, cooling fans, timers – they all suffer from constant cycling.
Train staff to check client prep properly. It feels awkward at first, but explaining the equipment protection angle makes conversations easier. Most people understand when they realise those beds cost thousands.
Record-keeping template
Documentation protects you during inspections and helps track equipment condition. Keep records for 2-5 years as best practice – that’s an operator recommendation, not legal advice.
Your hygiene log should include:
- Date and time of cleaning
- Technician name or initials
- Type of task (post-session wipe, deep clean, disinfection)
- Equipment serial numbers treated
- Products used and any issues noted
Simple entries work fine. “Deep clean bed #3, serial ABC123, standard protocol, no issues” tells the whole story. Note anything unusual though – strange odours, surface changes, cleaning product reactions.
Some operators go digital with tablets, others prefer paper logs. Either works if you’re consistent. The key is having something to show inspectors and track patterns over time.
With hygiene assured and logs kept, the next step is using records to inform a cost-effective servicing strategy.
Cost-benefit, record-keeping and predictive maintenance of commercial sunbed
Servicing reduces long-term costs by up to 40% – and for salon owners, that’s money straight back into your pocket.
The numbers don’t lie. Servicing saves 20-40% on long-term costs, whilst the global sunbed market valued at £3.5 billion in 2024 shows maintenance services growing 5% annually. Let me walk you through what this actually means for your business.
Take a single sunbed costing £8,000. Without proper servicing, you are likely to spend around £2,400 on repairs and early replacements over five years (this does not include the cost of lamp replacement – typically every 600 hours at around £800–£900). With regular maintenance? That figure drops to £1,440. Multiply that across three sunbeds and you have saved £2,880 – almost half the price of another unit. Importantly, failing to replace lamps makes the equipment very unhealthy for clients to use.
Here’s where it gets interesting though. Predictive maintenance changes everything. Instead of waiting for something to break, sensors monitor lamp hours, internal temperature, and fan RPM. They catch problems before they become expensive disasters. AI-driven diagnostics can reduce downtime by 30%, which means fewer disappointed customers and more revenue flowing.
I’ll be honest – the tech side used to intimidate me. But it’s simpler than you’d think.
If you want to pilot predictive maintenance:
- Audit your current equipment age and condition
- Use your sunbed controller (e.g. IdE Digital Sunbed Controller) to monitor lamp hours and service intervals manually.
- Start with one or two units as a trial
- Train staff on alert interpretation and response protocols
The real game-changer is proper record-keeping. You need logs that capture lamp hours, service dates, and replacement schedules. Keep maintenance records for three years minimum – five is better for warranty claims and resale value.
Use these logs to forecast replacements. When lamps hit 500-800 hours, you know they’re approaching end of life. Order replacements in advance. No more emergency purchases at inflated prices or disappointed customers facing closed sunbeds.
Your logs become a crystal ball. They show patterns – which units need attention most, seasonal usage spikes, even customer preferences. One salon I know discovered their newer customers preferred fresher lamps, so they rotate older units to regular clients who don’t mind the slight difference.
Temperature readings tell stories too. Consistent overheating often signals ventilation problems or failing fans. Catch it early and you’re talking about a £50 fan replacement instead of £400 worth of heat damage.
The organisation side matters as much as the technical bits. Structure your logs by unit, date, and maintenance type. Digital systems work brilliantly, but even a simple spreadsheet beats scattered paper notes.
These insights feed directly into an immediate 90-day servicing plan that transforms good intentions into measurable results.
Start servicing today: three-month action plan
Starting today makes more sense than waiting until something breaks. This plan works for one commercial unit or a home sunbed – just multiply the tasks if you’ve got more equipment. Think of it as building habits rather than doing chores.
Weeks 1-4: Getting Your Bearings
Daily (operator): Quick visual check of lamps during startup. Takes thirty seconds. Weekly (operator): Log lamp hours and wipe down reflectors – refer to our cleaning procedures section for the proper technique. Monthly (manager): Book that annual professional inspection now, even if it’s three months out. Schedule a deep clean session using the maintenance protocols we covered earlier.
Week 2 specifically – start your record-keeping system. Doesn’t matter if it’s a notebook or spreadsheet, just pick something and stick with it.
Weeks 5-8: Building Momentum
You should be getting into a rhythm now. Daily checks continue, but add weekly acrylic cleaning (operator task). The professional inspection you booked should be confirmed by now. Monthly milestone: review your first month’s logs and spot any patterns. This is where the cost-benefit tracking section becomes useful – you’ll have actual data to work with.
Weeks 9-12: Measuring Success
Same routine continues, but now you’re adding monthly KPI reviews. The professional service should happen during this period. Use their visit to validate your logging accuracy and ask questions about anything odd you’ve noticed.
Here’s what actually matters for measuring progress:
Lamp hours logged weekly (target: 100% compliance with recording). Calculate this as weeks with recorded hours divided by total weeks, times 100. Reported faults per month compared to your baseline – hopefully you’ll see this dropping. Cost savings versus previous quarter – add up what you didn’t spend on emergency callouts and replacement parts.
When things go sideways, here’s your escalation path. Lamp hours hitting 500? Check the replacement scheduling section immediately and order new tubes. Unusual noises or performance drops? Consult the troubleshooting guide first, then call a professional if it’s beyond basic fixes. Multiple faults in one week? Time for that deep maintenance review we detailed earlier.
Sample booking email: “Hi, we need to schedule our annual sunbed service for [unit model]. We’ve been logging hours and have maintenance records ready. What dates work in the next two weeks?”
Staff notification template: “New routine starting Monday – daily visual checks and weekly hour logging for the sunbed. Takes under 5 minutes total. Training sheet attached.”
The quarterly review will tell you if this system actually works for your situation or needs tweaking.